If camera settings feel like a wall of numbers, start with the few that actually change the photo: aperture for background blur, shutter speed for motion, and ISO for brightness support. Once those three make sense, the other controls become smaller decisions about focus, color, timing, and file type rather than a confusing menu of options.
What are camera settings?
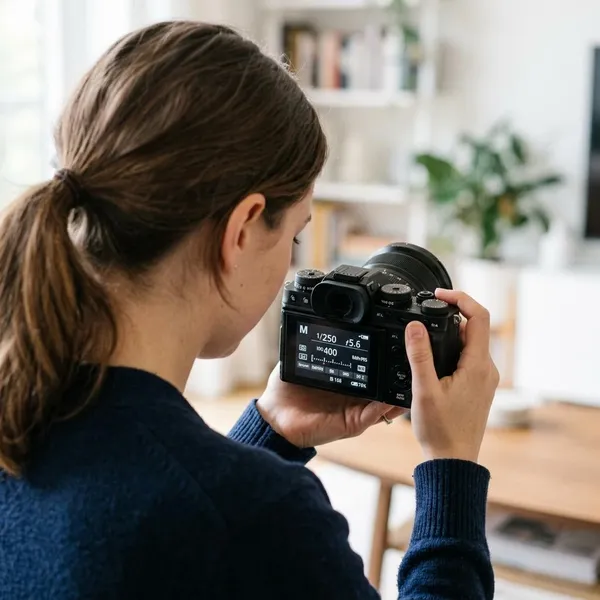
Camera settings are the controls that tell your camera how to expose, focus, color, and save a photo. Some settings affect the look of the image immediately, while others help the camera behave better in a specific situation.
Aperture controls depth of field
Aperture changes how much of the scene looks sharp from front to back. A wide aperture, such as f/1.8 or f/2.8, can blur the background and make a person, pet, or small object stand out. A narrower aperture, such as f/8 or f/11, keeps more detail sharp, which is usually better for landscapes, buildings, and group photos.
Shutter speed controls motion
Shutter speed decides whether movement freezes or blurs. A fast speed helps with sports, children, pets, and handheld shots. A slower speed can brighten a dark scene, but it also makes blur more likely unless the subject is still or the camera is on a tripod.
- Still subject: slower speeds may work if your hands are steady.
- Walking person or casual movement: use a safer, faster speed.
- Sports, birds, or running kids: prioritize shutter speed before anything else.
ISO controls sensitivity
ISO is the setting you raise when the photo would otherwise be too dark after choosing aperture and shutter speed. Low ISO gives cleaner files. Higher ISO helps in dim rooms, evening scenes, and indoor events, but it can add noise or grain.
Do not keep ISO low if it forces a shutter speed that makes the photo blurry. A slightly noisy photo of a real moment is usually more useful than a clean file where the subject is soft.
Other settings fine-tune the shot
The remaining settings solve the problems that exposure alone cannot fix. White balance handles strange color, autofocus settings decide what stays sharp, drive mode helps catch the right moment, and RAW or JPEG affects how much editing room you have later.
The three main camera settings
Aperture, shutter speed, and ISO are the main camera settings because they control exposure and strongly affect the final look of the photo. They are often called the exposure triangle, but it is easier to think of them as three trade-offs.
When one setting changes, another may need to compensate. A faster shutter speed lets in less light, so you may need a wider aperture or higher ISO. A narrower aperture keeps more in focus, but it may require more light, a slower shutter, or extra ISO.
Aperture
Use aperture when depth of field is the creative decision. For a portrait in a busy park, a wide aperture can soften the background so the face gets attention. For a travel photo where the street, buildings, and people all matter, a narrower aperture is usually the better choice.
Distance changes the effect too. The closer you are to your subject, the easier it is to blur the background. That is why a close-up photo can have strong blur even without using the widest possible aperture.
Shutter speed
Shutter speed should come first whenever motion could ruin the photo. This includes obvious action, like football or cycling, but also smaller movement, such as a child turning their head during a birthday photo.
ISO
ISO is best treated as the practical backup. Set the shutter speed you need for motion, choose the aperture you need for depth of field, then raise ISO if the image is still too dark.
Every camera handles high ISO differently, so it is worth making a quick test at ISO 800, 1600, 3200, and above. Look at the files on a larger screen, not just the camera display, and decide what level of noise still looks acceptable to you.
How they work together
The easiest way to combine the three settings is to choose the setting that protects the photo first:
- Movement first: if the subject moves, choose a safe shutter speed.
- Depth second: decide whether you want blur or more overall sharpness.
- ISO last: raise it only as much as needed to finish the exposure.
- Review once: check brightness and sharpness before the moment passes.
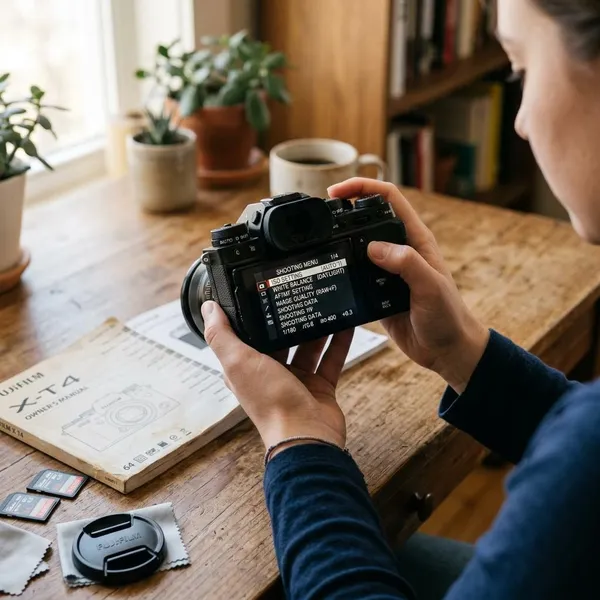
Other camera settings to know
After exposure, the next useful settings are the ones that prevent avoidable mistakes: wrong color, missed focus, bad timing, or files that do not suit how you want to use the photo. You do not need to change all of them every time you shoot.
Think of these as problem-solving controls. If the photo is bright enough but still looks wrong, one of these settings is often the reason.
Exposure compensation
Exposure compensation is a quick brightness correction for Auto, Aperture Priority, and Shutter Priority modes. Use the plus side when the camera makes the subject too dark, and the minus side when the camera makes the scene too bright.
This is especially useful for backlit portraits, snow, beach scenes, dark clothing, and bright windows. Start with small changes such as +0.3, +0.7, or -0.3 rather than jumping too far.
White balance
White balance controls whether colors look too blue, too yellow, or reasonably natural. Auto white balance is fine for many everyday photos, but it can struggle under mixed indoor lighting or heavy shade.
- Indoor photos look orange: try a tungsten or indoor preset.
- Shade looks too blue: try cloudy or shade.
- RAW files: you can correct white balance more easily later.
Autofocus mode
Autofocus mode controls how focus behaves after you press the shutter halfway or start focusing. Single autofocus works well for still subjects. Continuous autofocus is better when the subject keeps moving.
AF area mode
AF area mode decides where the camera looks for focus. A single focus point gives precise control for portraits, products, flowers, and still scenes. Wider area or tracking modes are usually easier for movement because the camera has more room to follow the subject.
If the camera keeps focusing on the background, switch to a smaller or more controlled focus area. If you cannot keep a tiny point on a moving subject, use a wider tracking area instead.
Metering mode
Metering mode tells the camera how to read light in the scene. The general all-frame mode, often called matrix, evaluative, or multi metering, is the safest default for most beginners.
Change metering only when the camera repeatedly misreads a difficult scene. Spot metering can help with a performer under a stage light or a bird against a bright sky, but it also requires more careful aiming.
Drive mode
Drive mode controls whether the camera takes one photo, a burst of photos, or a delayed shot. Single shot is fine for calm subjects. Burst mode is useful when the expression or action changes quickly.
RAW or JPEG
JPEG is easier: smaller files, quick sharing, and less editing. RAW gives you more flexibility if you want to recover shadows, adjust white balance, or edit important photos more carefully.
| Choose this | When it makes sense |
|---|---|
| JPEG | Everyday snapshots, quick sharing, minimal editing |
| RAW | Important photos, tricky light, planned editing |
| RAW + JPEG | Learning both without committing too early |
How to choose camera settings
The fastest way to choose camera settings is to follow the same order each time: movement, light, depth of field, ISO, then review. This keeps you from changing random settings and hoping the photo improves.
Start with subject movement
Ask whether the subject is still, slowly moving, or moving fast. If motion matters, shutter speed becomes the first decision because motion blur is hard to fix later.
A still plate of food gives you time to choose aperture and composition. A dog running toward you does not. In that second situation, protect sharpness first, then adjust the rest.
Check the available light
Before changing numbers, notice the light: bright daylight, indoor window light, deep shade, evening, or artificial light. Bright scenes give you room to keep ISO low and still use faster shutter speeds. Dim scenes force more compromise.
If the light is poor and the subject is important, the best fix may not be a camera setting. Move closer to a window, turn on a lamp, face the subject toward light, or wait for a brighter moment if you can.
Choose your depth of field
Decide whether the background should disappear or stay part of the story. A wide aperture suits portraits, details, and cluttered backgrounds. A narrower aperture suits groups, landscapes, interiors, and scenes where context matters.
- One person against a messy background: use a wider aperture.
- Several people in different rows: avoid going too wide.
- Close-up details: check focus carefully because depth of field can become very thin.
Adjust ISO last
After shutter speed and aperture are doing the job you need, use ISO to bring the exposure into a usable range. Auto ISO can be helpful for changing light, especially during travel, events, or family days where you do not want to miss moments while adjusting every shot.
If the camera lets you set a maximum Auto ISO or a minimum shutter speed, use those limits as guardrails. That gives you convenience without letting the camera choose settings that are too noisy or too slow for your needs.
Check the final exposure
Take a quick look before you move on. Check whether the subject is sharp, the brightness is acceptable, and the motion looks intentional. Zoom in if the shot matters.
Make one correction at a time. If the photo is blurry, fix shutter speed or focus before worrying about color. If the photo is sharp but too dark, adjust exposure or ISO. This small habit teaches faster than changing three settings at once.
Conclusion
The best beginner approach is not to memorize every camera menu, but to know what to check first: motion, light, depth of field, then ISO. If a photo fails, connect the problem to the setting that controls it—blur usually points to shutter speed or focus, strange color to white balance, and noisy dark photos to the limits of available light. That practical order makes the camera feel less like a puzzle and more like a tool you can gradually control.