If you want to fix video game consoles, do not start by opening the shell. Start with the symptom, the model, the cables, and the simplest outside causes, because many "dead" consoles turn out to have a bad power lead, a loose HDMI connection, dust buildup, or a software glitch. Home repair makes sense for cleaning, batteries, some joysticks, and simple parts; soldered HDMI ports and motherboard faults are usually a different level of risk.
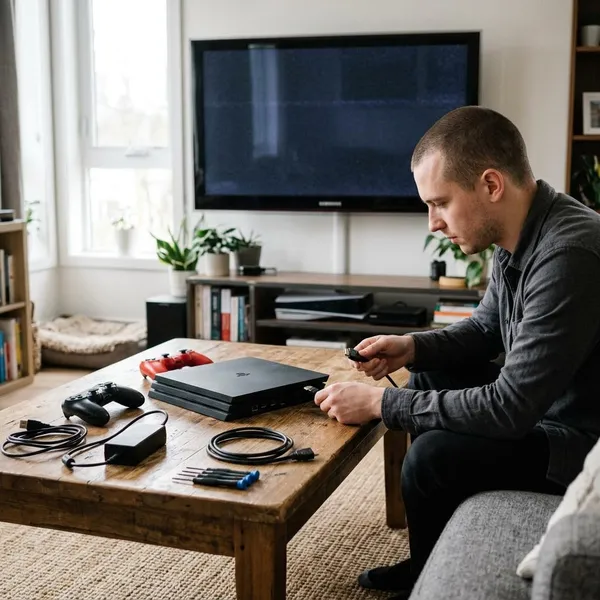
What to check before repairing a game console
The first checks should be boring on purpose. If the console has no power, no picture, random shutdowns, disc errors, or controller problems, rule out the parts you can test without tools before you spend money or remove screws.
Confirm the exact console model
Check the model number before following any repair video or ordering parts. A PS4, PS4 Slim, and PS4 Pro may share a name family, but they do not always use the same fan, power supply, shell layout, or internal connectors.
Check the power cable and outlet
Test the console in a wall outlet you know works, preferably without a power strip or extension lead. Look for a loose plug, cracked cable, overheating marks, or a power brick light that behaves differently than usual.
Test the HDMI cable and display
A black screen does not automatically mean the HDMI port is broken. Try a different HDMI cable, a different HDMI port on the TV, and another screen if you can. Also confirm the TV is on the correct input.
- Image appears when the cable is held at an angle: port damage becomes more likely.
- No signal on one TV but not another: the display, input, or resolution setting may be involved.
- No signal with several cables and screens: the console may need deeper diagnosis.
Restart and update the console
Shut the console down fully instead of using sleep mode, disconnect power for a short moment, then restart it. If it boots, install pending system updates and check whether the same problem returns.
This is especially worth doing for menu freezes, controller pairing issues, strange startup behavior, or display problems after changing TVs. Software faults can look like hardware faults, and this check costs nothing.
Disconnect unnecessary accessories
Remove external drives, USB hubs, charging docks, steering wheels, camera accessories, adapters, and extra controllers. Start the console with only power, video, and one basic controller if needed.
How to fix a video game console
A sensible repair process moves from low-risk checks to higher-risk work. Do not jump from "no picture" straight to "replace the HDMI port" until cables, display settings, software, and obvious physical signs have been checked.
Identify the exact symptom
Write the problem as a specific sentence: "The console powers on but has no image," "It shuts down after 20 minutes," "Only discs fail," or "The left stick moves by itself." That one sentence points you toward the right area instead of making you troubleshoot the whole system.
Timing also matters. A console that fails immediately may have a power or board issue, while one that fails after long play may be overheating. A handheld that works when plugged in but dies quickly is a different repair from one that will not charge at all.
Rule out cables and software issues
Before opening the case, swap the easy external parts: power cable, HDMI cable, charger, controller, and display. If the console still reaches menus, check updates, storage warnings, safe mode options, and controller settings.
Find the likely faulty component
Match the symptom to the most likely part, then look for evidence before replacing anything.
| Symptom | Likely area to check first | Home repair outlook |
|---|---|---|
| Loud fan, heat warnings, shutdowns during play | Vents, fan, heat sink, thermal path | Often reasonable if it is cleaning or fan access |
| No display but console powers on | HDMI cable, display settings, HDMI port, video circuit | External checks are easy; soldered port work is advanced |
| Discs spin but do not read | Lens, rollers, spindle, drive mechanism | Possible with exact model guidance |
| Controller drift | Stick calibration, dirt, joystick module | Sometimes simple, sometimes soldering |
| Handheld dies quickly | Battery, charger, charging port | Battery swaps can be manageable if the pack is model-correct |
Disconnect power before disassembly
Unplug the power cable, HDMI cable, accessories, memory cards if used, and any inserted disc. For handhelds, remove the battery first if the design allows it.
Keep screws sorted by location and take photos as you go. Many consoles use different screw lengths, and putting a long screw in the wrong place can damage plastic or a board underneath.
Clean or replace the damaged part
Start with inspection and cleaning before replacing parts. Dust, pet hair, corrosion, loose ribbon cables, cracked ports, swollen batteries, and broken plastic guides are all things you may see once the shell is open.
- Confirm the suspect area: match what you see to the original symptom.
- Use the right tools: avoid forcing security screws or plastic clips.
- Clean airflow paths first: vents, fans, and heat sinks can cause dramatic symptoms.
- Replace only confirmed parts: use model-matched batteries, fans, sticks, or drive parts.
- Stop at micro-soldering if you are not equipped: HDMI ports and board pads are easy to damage.
Reassemble and test the console
Test the repair with only the essentials connected before returning the console to its normal setup. For a display fault, wiggle-free image stability matters. For overheating, run a longer session. For disc problems, test more than one disc. For a battery swap, check charging and runtime over more than a few minutes.
If the same fault remains, do not keep replacing parts randomly. Recheck connectors and ribbon cables first; after that, the real cause may be deeper than the part you can see.
Which console repairs can you do yourself?
The best DIY repairs are the ones with low risk, visible causes, and replaceable parts. The worst first repairs are the ones that need board diagnosis, hot air soldering, or guessing around power circuits.
Cleaning dust and vents
Dust cleaning is one of the safest places to start. It is especially useful for older consoles kept in tight TV cabinets, homes with pets, or systems that sound louder than they used to.
Use controlled air, a soft brush where appropriate, and patience. Avoid spinning fans aggressively with compressed air, and do not scrape heat sinks or boards with metal tools.
Replacing simple external parts
External parts are the lowest-risk repairs: HDMI cables, power leads, charging cables, removable storage accessories, and battery covers. Try these before assuming an internal part failed.
Replacing some batteries and joysticks
Some handheld and controller batteries are realistic home repairs, but only with the correct replacement pack. Match the model, connector, size, and battery type rather than buying the cheapest part with a similar name.
Joystick drift is similar: mild drift may improve with cleaning or recalibration, while repeated drift usually points to a worn joystick module. Check whether your controller uses a modular part or a soldered stick before deciding it is a quick job.
Repairing disc drives with model-specific guidance
Disc drive repairs can be manageable when the problem is simple and the guide matches your exact console. Cleaning a lens or replacing an obvious loading part is very different from adjusting lasers, motors, sensors, or drive boards.
Leaving HDMI soldering to experienced repairers
HDMI port replacement is usually not a beginner repair. It often needs hot air tools, soldering skill, magnification, and inspection for torn pads or damaged traces near the port.
The risk is that a repairable broken port can become a motherboard repair after too much heat or lifted pads. If the console is valuable, paying an experienced repairer can be cheaper than learning on that board.
Leaving motherboard damage to professionals
Liquid damage, burned components, shorted power rails, missing pads, and corrosion under shields are professional-level problems. The visible symptom may be "no power," but the real fault could be anywhere in the power or control circuitry.
When to repair or replace a console
The decision is not only technical. Compare the likely repair cost, the value of the console, parts availability, your skill level, and how much risk you are willing to take.
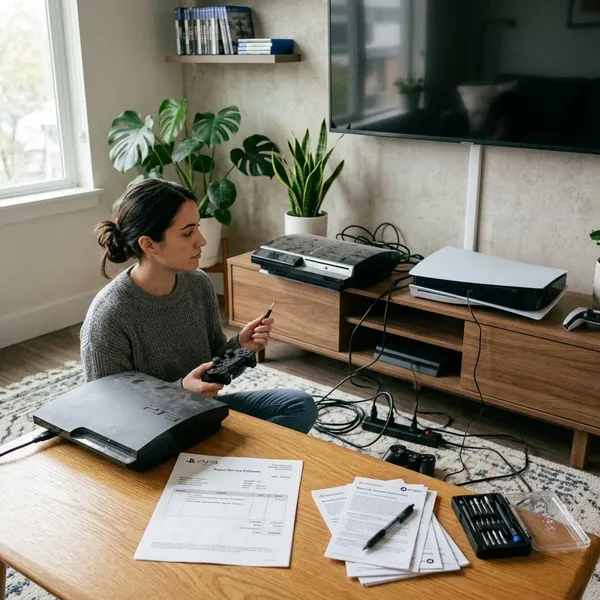
Repair when the fault is simple and affordable
Repair is usually worth considering for dust buildup, worn fans, weak batteries, drifting sticks, bad cables, or small mechanical disc-drive issues. These faults have a clearer path from symptom to fix.
Repair when replacement parts are easy to find
Common consoles are often easier to repair because parts, teardown photos, and repair experiences are easier to compare. That helps you avoid mystery parts and vague listings.
Before ordering, check three things: the exact model number, the part photos against your original part, and whether the repair requires soldering. If any of those are unclear, pause before buying.
Replace when repair costs approach console value
Replacement starts to make sense when parts, tools, shipping, and labor come close to the price of a working used console. This is especially true for common older systems where another working unit is easy to find.
Do not compare only the part price. A cheap HDMI port is not cheap if the work needs professional soldering, and a low-cost drive part may still be a bad gamble if the fault has not been confirmed.
Replace when major board damage is present
Major motherboard damage usually pushes the decision toward replacement unless the console is rare, newer, valuable, or personally important. Heavy corrosion, torn pads, liquid damage, and power-circuit faults can take time to diagnose and still have an uncertain result.
Conclusion
The smartest repair is the one that matches both the fault and your skill level. Start with model, power, HDMI, software, and accessory checks; move on to cleaning or simple parts only when the evidence points there. If the job involves soldered ports, liquid damage, or unclear board faults, getting a proper diagnosis is usually better than turning one repair into several.