If your Dyson has lost suction, smells dusty, or leaves hair behind, start with the simple maintenance points first: empty the bin, wash the filter only with cold water, clear the brush bar, and keep electrical or cyclone parts dry. The most important rule when learning how to clean Dyson vacuum parts is not to rush reassembly; anything washable must be completely dry before it goes back on the machine.
How to clean a Dyson vacuum
A full basic clean is usually enough when a Dyson feels weaker than normal. Work in this order: make it safe, remove loose dirt, deal with airflow parts, clear anything that spins, then dry and test before using it again.
Turn off and disconnect the vacuum
Switch the vacuum off before touching the bin, filter, or cleaner head. Unplug corded models, remove cordless models from the charger, and detach the battery if your model is designed for that. This is especially important when your hands are near the brush bar, because an accidental trigger press can turn a quick clean into a painful mistake.
Set the vacuum somewhere stable with good light. A trash bag, microfiber cloth, scissors, and a coin or flathead screwdriver are usually enough for the job, depending on the cleaner head design.
Empty the dust bin
Empty the bin over a trash can before washing or wiping anything else. Hold it low in the trash can opening to reduce dust clouds, press the release, and let loose dirt fall out without shaking the machine aggressively.
Do not let the dirt pass the max line. Once the bin is packed, airflow drops and dust is pushed toward the filter faster. If you have just vacuumed fine powder, pet litter, or renovation dust, empty slowly and consider doing it outside because very fine debris can puff back into the room.
Remove and clean the filter
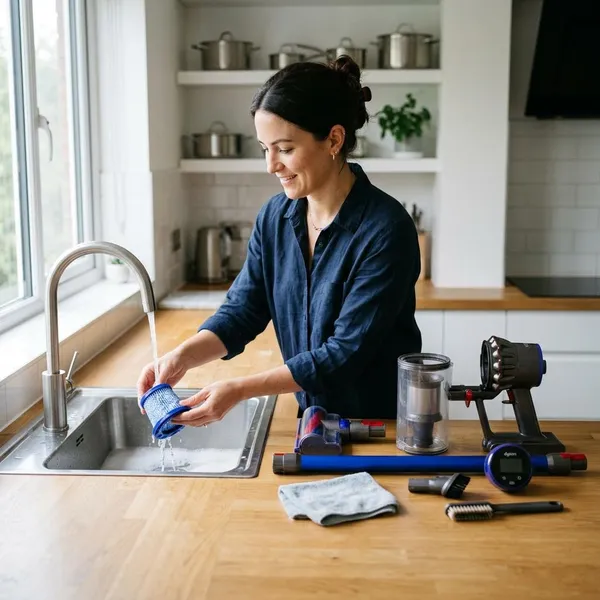
Remove the filter according to your model, tap off loose dust, then rinse it under cold water only. Do not use soap, scented cleaners, bleach, or a dishwasher. Those can leave residue in the filter material and make airflow worse instead of better.
Keep rinsing until the water looks clear, then shake out excess water. If your Dyson has more than one filter, keep them separate so each one goes back in the right place.
Clear hair from the brush bar
Turn the cleaner head over and look along the full length of the brush bar, especially the ends. Hair, thread, carpet fibers, and pet fur often collect there first and can stop the roller from spinning freely.
For long hair or pet-heavy homes, this is often the part that needs attention most often. Cut wrapped hair carefully along the groove if the roller has one, then pull the loosened strands away by hand rather than digging scissors into the bristles or soft roller surface.
Wipe the bin and vacuum body
Use a slightly damp microfiber cloth for the outside of the bin, handle, wand, and body. The cloth should be damp enough to lift dust, not wet enough to drip into seams, battery contacts, or the motor area.
- Good to wipe: clear bin walls, handle, wand, wheels, and outer casing.
- Keep dry: cyclone assembly, battery contacts, motor housing, and powered cleaner head parts.
- Use dry tools: a soft brush or dry cloth for narrow dusty gaps.
Let washable parts dry completely
Leave washed filters and approved washable brush bars to air-dry for at least 24 hours. In a humid room, a cool utility space, or winter weather, they may need longer. They should feel dry all the way through, not just on the outside.
Reassemble and test the vacuum
Once every part is dry, refit the filter, bin, brush bar, and end cap until each piece clicks or seats properly. Test the vacuum on a small patch of floor and listen for normal sound, steady suction, and smooth brush movement.
If it still pulses, smells odd, or feels weak, stop and check for a hidden blockage in the wand, hose, or cleaner head channel. A clean filter will not fix a clog that is sitting farther down the airflow path.
How to clean a Dyson filter
The filter is the first part to clean when suction feels uneven, the machine pulses, or the exhaust smells dusty. For most Dyson filters, the safe method is simple: remove, tap, rinse with cold water, shake, dry fully, and reinstall only when completely dry.
Remove the filter
Take the filter out using the release, twist, or pull method for your model. Many cordless Dysons have a filter at the top or rear of the motor unit, while some upright models place it in a side or ball section.
If it does not move easily, do not force it. Stuck tabs or a poor angle can crack plastic or damage the seal. A damaged filter, torn mesh, or misshapen frame is usually better replaced than washed again.
Tap out loose dust
Tap the filter gently over a trash can before rinsing. This removes surface dust and stops your sink from immediately filling with dry debris.
Use your fingers to remove lint or fuzzy buildup, but avoid sharp tools. The aim is to open the surface enough for water to pass through, not to scrape or crush the filter material.
Rinse the filter without detergent
Run cold water through the filter and turn it as you rinse so water reaches the pleats, mesh, or foam areas. Squeeze or rub only as gently as your model's filter material allows.
Soap is not a shortcut here. It can leave a film that traps dust faster later, so plain cold water is the safest choice unless Dyson gives different instructions for your exact filter.
Shake out excess water
After rinsing, shake the filter over the sink from several angles until it stops dripping heavily. This does not dry it, but it removes water trapped in the deeper layers and helps shorten the drying time.
Let the filter dry completely
Place the filter in a warm, ventilated area for at least 24 hours. Set it so air can move around it rather than leaving one side pressed flat against a surface.
Reinstall the dry filter
Put the filter back only when you are confident it is dry inside and out. Match any arrows, tabs, or twist marks, then check that it sits firmly without gaps.
Run the vacuum briefly after reinstalling. If the pulsing or filter warning continues, reseat the filter and check for a blockage before assuming the motor or battery is the problem.
How to clean the Dyson bin
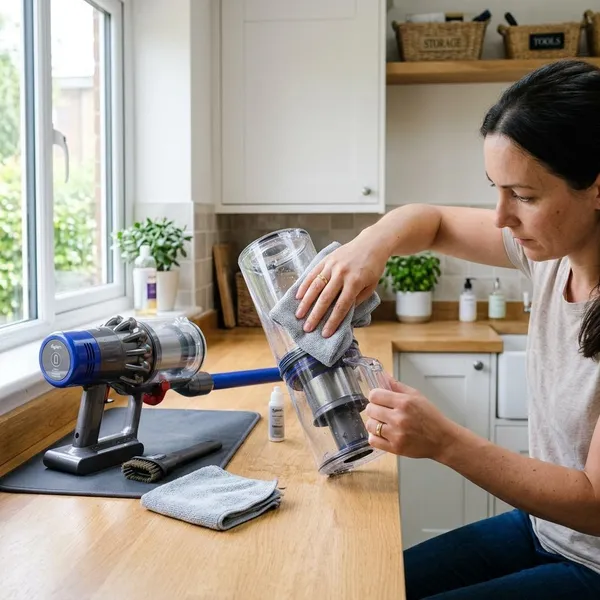
The bin needs a different approach from the filter because it sits close to the cyclone and release mechanism. Empty loose debris first, wipe the clear bin when needed, and keep the cyclone and electrical areas dry unless your exact model says otherwise.
Empty loose dirt and debris
Open the bin fully over a trash can and let debris drop out before wiping. If dirt sticks to the sides, tap the bin lightly rather than banging the vacuum against the trash can.
Check the chute and flap area for hair, string, or compacted debris. If the flap cannot close cleanly, suction and mess control both suffer during the next use.
Remove the bin when the model allows
Some Dyson clear bins detach from the cyclone assembly, which makes wiping easier. If your model has a bin release, use it gently and pay attention to how the bin slides off.
Stop if the bin feels stuck. Forcing it can crack clips or misalign the seal, and a poor seal can make the vacuum feel weaker even after the bin looks clean.
Wipe the bin with a damp cloth
Wipe the inside and outside of the clear bin with a damp microfiber cloth. Focus on the lower edge, corners, and dust line where fine debris clings.
For sticky dust, hold the damp cloth on the spot for a few seconds, then wipe again. Harsh cleaners are usually unnecessary and may cloud the plastic or leave a smell inside the bin.
Keep the cyclone and electrical parts dry
Keep water away from the cyclone assembly, motor housing, battery contacts, and powered cleaner head connections. If those areas are dusty, use a dry cloth or soft brush instead of rinsing.
Refit the bin after it is dry
Let the bin dry before putting it back, especially around hinges, seals, and latch points. Moisture left there quickly grabs fresh dust and can make the release feel sticky.
After refitting, open and close the bin once before using the vacuum. If the flap does not seal neatly, look for trapped grit along the edge rather than pushing harder.
How to clean a Dyson brush bar
The brush bar needs attention when the vacuum leaves hair behind, feels harder to push, or makes the cleaner head sound rough. The safe rule is to remove hair first, wipe non-washable rollers, wash only approved rollers, and never put a damp roller back into a powered head.
Remove the brush bar when possible
Turn the cleaner head over and look for the end cap, coin slot, or release latch. If the design allows removal, unlock it and slide the brush bar out carefully.
Take a quick photo before removing small parts if the layout looks confusing. That makes reassembly much easier, especially on heads with side caps or rollers that only fit one way.
Cut away wrapped hair and fibers
Use scissors to cut through wrapped hair, thread, or carpet fibers, then pull the loosened strands away by hand. Work along the groove if the brush bar has one, and keep the scissor tips away from bristles, soft roller fabric, and rubber strips.
Pay close attention to the ends of the roller. Hair often tightens there and creates drag, which can make the brush bar spin poorly even when the middle looks clean.
Wipe non-washable brush bars clean
If the brush bar is not approved for washing, clean it with a dry or slightly damp cloth. Wipe the roller surface, end caps, axle area, and any accessible dust inside the cleaner head housing.
- Use dry cleaning for standard motorized brush bars unless washing is clearly allowed.
- Keep water out of bearings, electrical contacts, and the cleaner head body.
- Inspect the ends because hidden hair there often causes noise or poor spinning.
Wash only brush bars approved for washing
Some soft roller brush bars can be rinsed with cold water, but that does not mean the whole cleaner head can be washed. Remove only the washable roller part and keep the powered housing dry.
Rinse with cold water and rub away dust gently with your hands. This is most useful for soft rollers used in kitchens, entryways, or homes where the vacuum picks up fine crumbs and sticky floor film.
Let washable brush bars dry completely
Air-dry washable brush bars for at least 24 hours, and longer if the roller feels dense or the room is humid. Turn the roller during drying so one side does not stay damp against a surface.
A damp roller can transfer moisture into the cleaner head and collect dust immediately, so waiting longer is better than testing it too soon.
Reinstall the brush bar correctly
Slide the brush bar back into place, lock the end cap, and check that it sits straight. If your model lets you turn it by hand, it should move without scraping or catching.
Conclusion
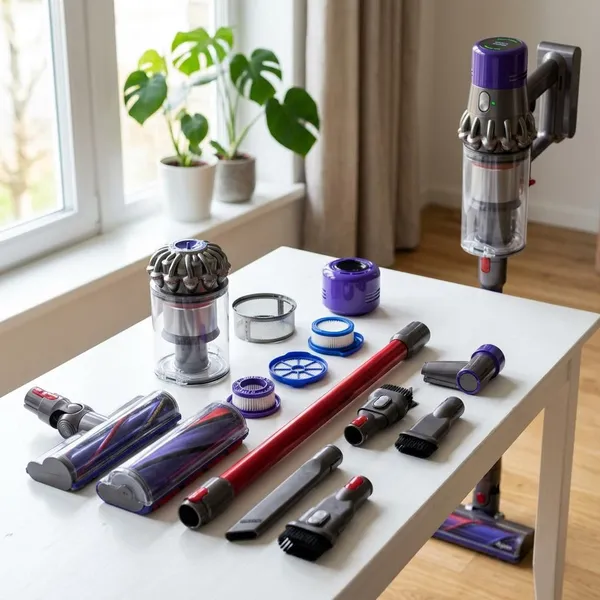
A Dyson usually cleans best again after the obvious airflow points are handled in the right order: bin, filter, brush bar, and drying time. If you remember only one caution, make it this one: wash less than you think, dry longer than you want to, and keep the cyclone and powered parts away from water unless your exact model clearly allows it.